A sauna heater install has three parts that matter more than anything else: a correctly sized dedicated electrical circuit, a floor and wall setup that meets the manufacturer’s clearance and fire-safety requirements, and a guard rail properly mounted before first use. Skipping or shortcutting any of the three is the most common reason new installs fail inspection or need costly rework later.
1. Confirm the Electrical Circuit Before Buying the Heater
Most heaters above roughly 6 kW require a dedicated 240-volt circuit sized to the heater’s amperage draw, which is specified in the installation manual. Before ordering a heater, check whether the electrical panel has an open breaker slot and enough spare capacity, since panels near their limit sometimes need an upgrade before a new circuit can be added at all. This step belongs first on the list because it can change the total budget and timeline more than any other part of the project.
2. Hire a Licensed Electrician for the Circuit Run
The National Fire Protection Association’s electrical code and most local jurisdictions require a permit and inspection for new dedicated circuits, and a licensed electrician is the standard path for this work rather than a DIY wiring job. A short run close to the panel might take a few hours; a longer run to a detached backyard cabin, especially one needing trenching, can take a full day or more. Getting this scheduled before the heater arrives keeps the project moving instead of leaving a heater sitting in a box for weeks.
3. Prepare a Non-Combustible or Protected Floor Base
Most manufacturer manuals call for a protected floor surface under and immediately around the heater, since radiant heat and occasional stray sparks from stones can discolor or damage untreated wood over years of use. A tile, stone, or manufacturer-approved protective mat under the heater footprint satisfies most requirements. This is a cheap step to add during initial construction and a genuinely annoying one to retrofit later once benches and paneling are already installed.
See also: Why I Chose a Wood-Burning Sauna Over Electric
4. Follow the Manufacturer’s Wall and Ceiling Clearances Exactly
Clearance requirements differ by model and are not universal, so always check the specific heater’s manual rather than assuming a number from a different brand applies. A common range is 3 to 8 inches of side clearance from a combustible wall and roughly 2 feet of clearance to the ceiling above the heater, though higher-wattage units sometimes need more. Underground Writers Laboratories listing information, when available for a given heater, documents the tested clearance minimums for that specific model, which is worth checking against the printed manual for consistency.
5. Mount the Guard Rail Before First Use
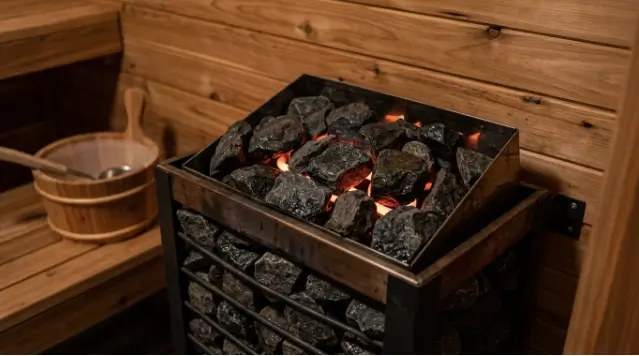
Nearly every home sauna heater ships with a guard rail or cage designed to prevent accidental contact with the hot stones and elements, and it should be mounted and torque-checked before the heater’s first heating cycle, not treated as an optional accessory to add later. This single component is responsible for most of the injury-prevention value of a modern heater compared with older, unguarded designs, so skipping it even for a single test run is not worth the risk.
6. Check Ventilation Requirements for the Cabin
Most sauna designs call for a small fresh-air intake vent near the floor, typically below or near the heater, and an exhaust vent higher on an opposite wall, to keep air circulating during a session. This is a ventilation detail rather than an electrical one, but it is commonly overlooked during a heater-focused install and affects both comfort and how evenly the heater’s output distributes through the room.
7. Schedule the Inspection Before Covering Any Wiring
If a permit was pulled for the new circuit, most jurisdictions require an inspection before the wiring is closed up behind paneling. Scheduling this before finishing the cabin’s interior wall panels avoids the expensive scenario of having to open a finished wall back up because an inspector needs to see the connection point. Buyers researching heaters with published clearance specs and guard rail designs that make this whole process easier can check SweatDecks’ lineup alongside other retailers’ installation documentation before finalizing a model.
What Does the Research Say About Session Safety Once Installed?
Once a heater is properly installed and reaches a stable target temperature, most of the health research on sauna bathing describes sessions in the 170 to 190 degree Fahrenheit range for 15 to 20 minutes. A 2018 review in Mayo Clinic Proceedings found regular use at these ranges associated with lower rates of cardiovascular events in large cohort studies, and a 2001 review in The American Journal of Medicine outlined both benefits and known contraindications, including caution for unstable cardiovascular conditions. These are association findings from observational data, not a guarantee of outcomes for any individual, but they underscore why a heater that reliably and safely reaches its target temperature range matters beyond simple comfort.
8. Test the Heater Empty Before the First Real Session
Run the heater through a full cycle with stones in place but before anyone sits inside, checking that it reaches target temperature within the expected 30 to 45 minute window and that the controls respond correctly to timer and shutoff settings. This dry run also gives any new-appliance smell from the elements or interior finish a chance to burn off in an empty room rather than during someone’s first real session. It is a five-minute step that catches wiring or control issues while the electrician or installer might still be nearby to fix them.
9. Keep the Installation Documentation on Hand
Store the electrical permit, inspection sign-off, and heater manual together somewhere accessible, since future homeowners, insurance adjusters, or a technician doing warranty work will often ask for proof the circuit was installed and inspected to code. This is an easy step to skip in the moment but a genuinely useful one a year or two down the line if anything about the heater or the wiring ever needs attention.
Frequently Asked Questions
Can a homeowner install a sauna heater themselves? Mounting the heater is usually simple DIY work, but the dedicated 240-volt circuit almost always needs a licensed electrician and a permit.
What clearance does a sauna heater need from the wall? It varies by model, commonly 3 to 8 inches from a side wall and roughly 2 feet overhead, per the manufacturer’s manual.
Does a sauna heater need a non-combustible floor pad? Most manufacturers require a protective floor covering under and around the heater base.
How long does a professional sauna heater install take? Typically half a day to a full day, between the electrical work and mounting the heater and guard rail.
References
- Cardiovascular and Other Health Benefits of Sauna Bathing: A Review of the Evidence, Mayo Clinic Proceedings, 2018
- Benefits and risks of sauna bathing, The American Journal of Medicine, 2001
- Clinical Effects of Regular Dry Sauna Bathing: A Systematic Review, Evidence-Based Complementary and Alternative Medicine, 2018
- National Fire Protection Association, electrical and structure safety standards
- Underwriters Laboratories, product safety listing standards
By Bethany Kowalczy